Step-by-Step Guide: Create a Contact Form with Fabrik in Joomla
Introduction
In this guide, we will show you how to create a contact form using the Fabrik component in Joomla. The contact form will allow you to receive messages from your users in a simple and organized manner. Follow this step-by-step guide to create your custom contact form.
What We Will Do
- Create the Contact Form
- Create and Validate Form Elements
- Configure Email Sending
- Customize Visible Elements in the List
- Set Up Menu to View Sent Messages
Step 1: Create the Contact Form
- Access the Joomla administration panel.
- Go to Components > Fabrik.
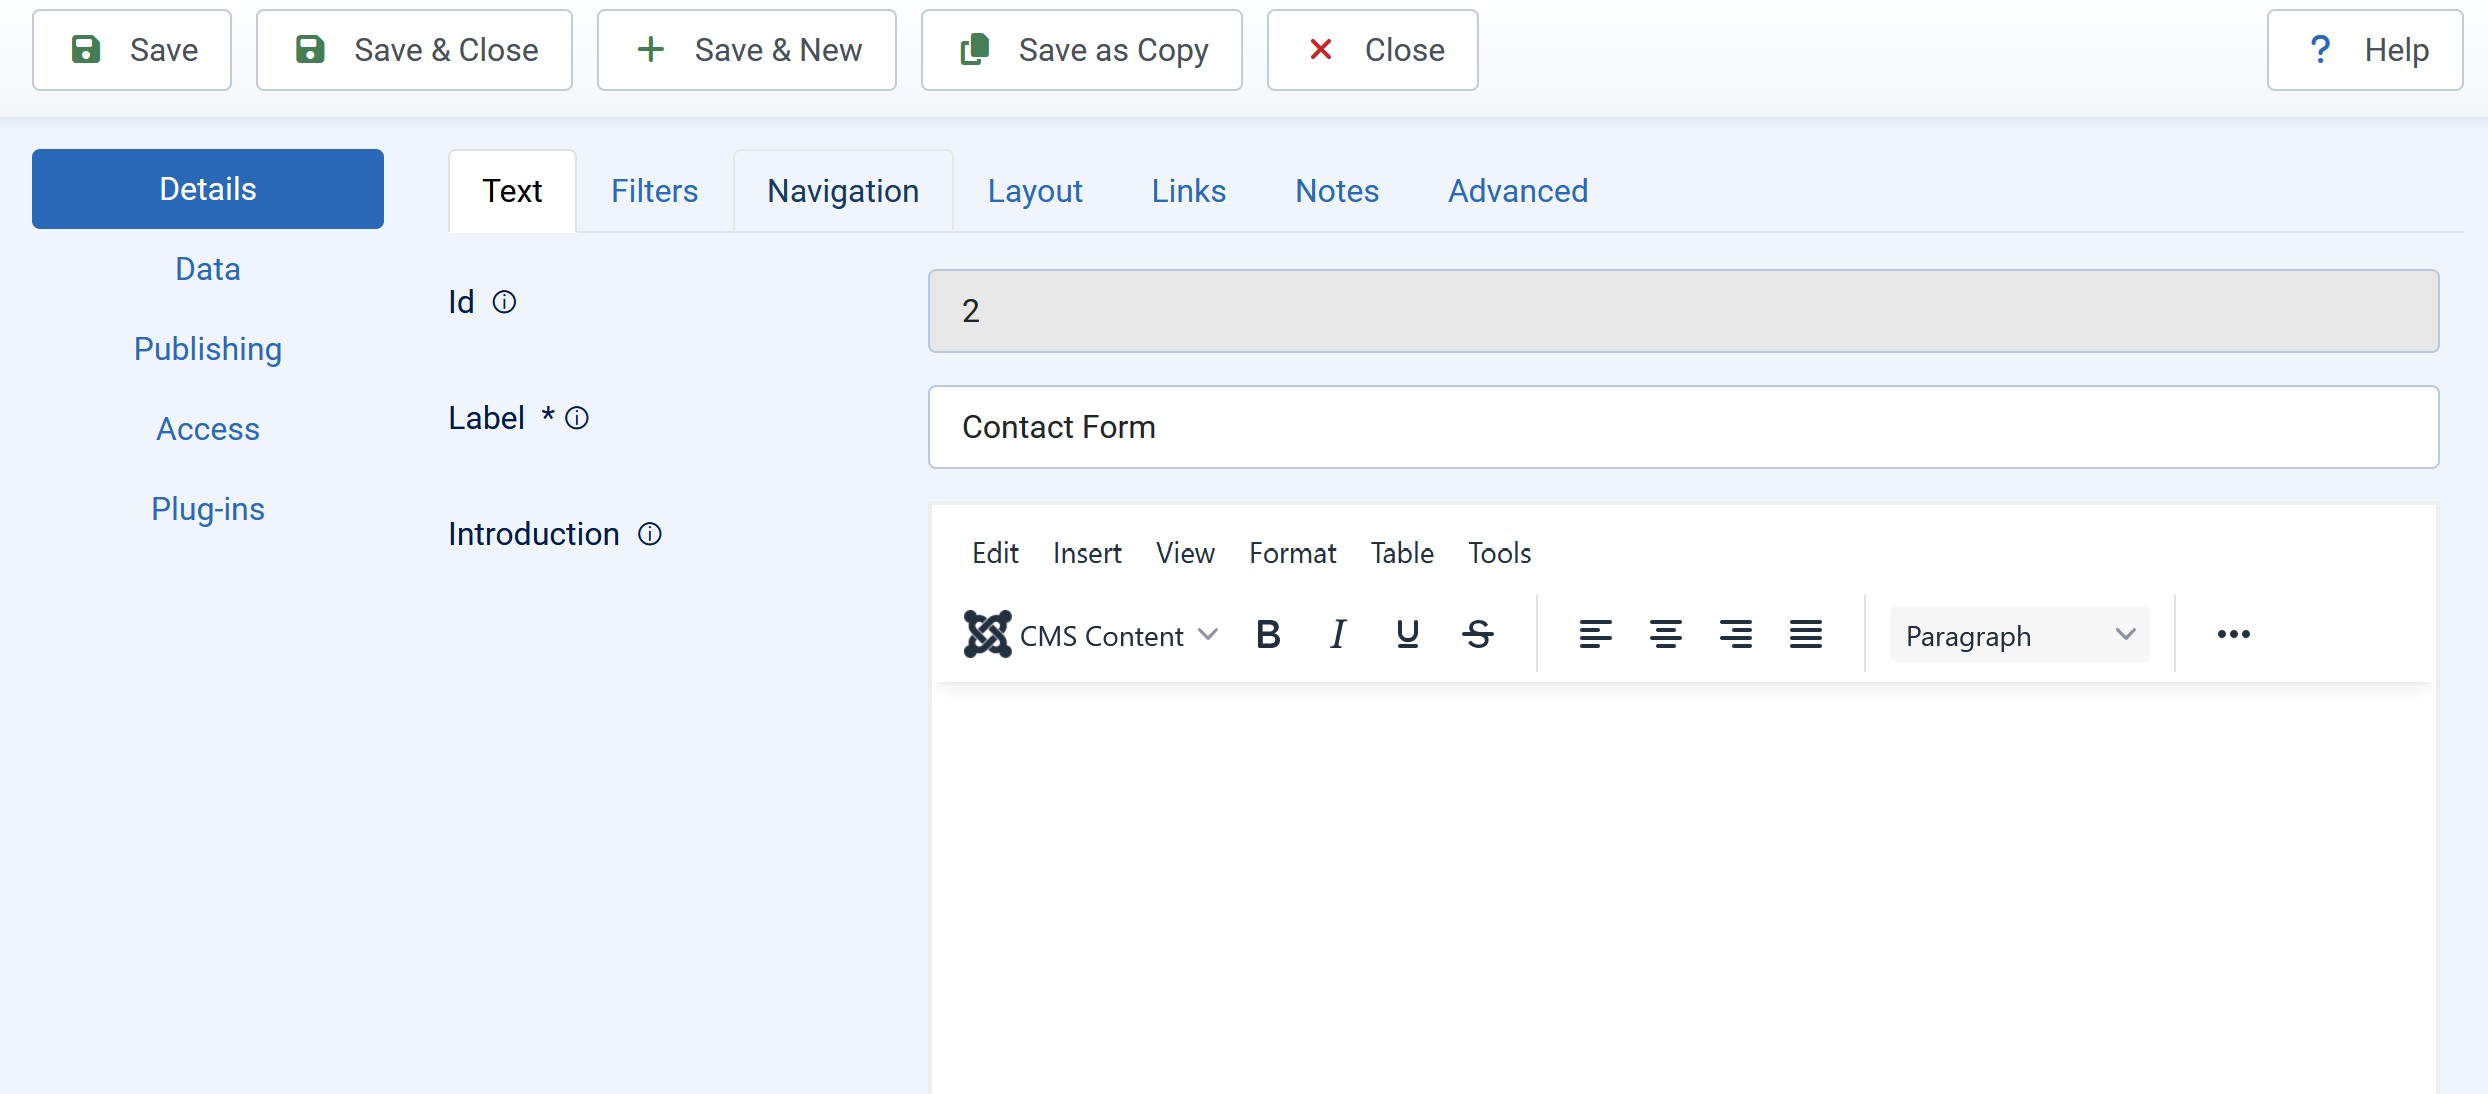
- Select Lists and click New to create a new list.
- Assign a name to your form, for example, "Contact Form".
Step 2: Create and Validate Form Elements
- Navigate to Fabrik > Elements.
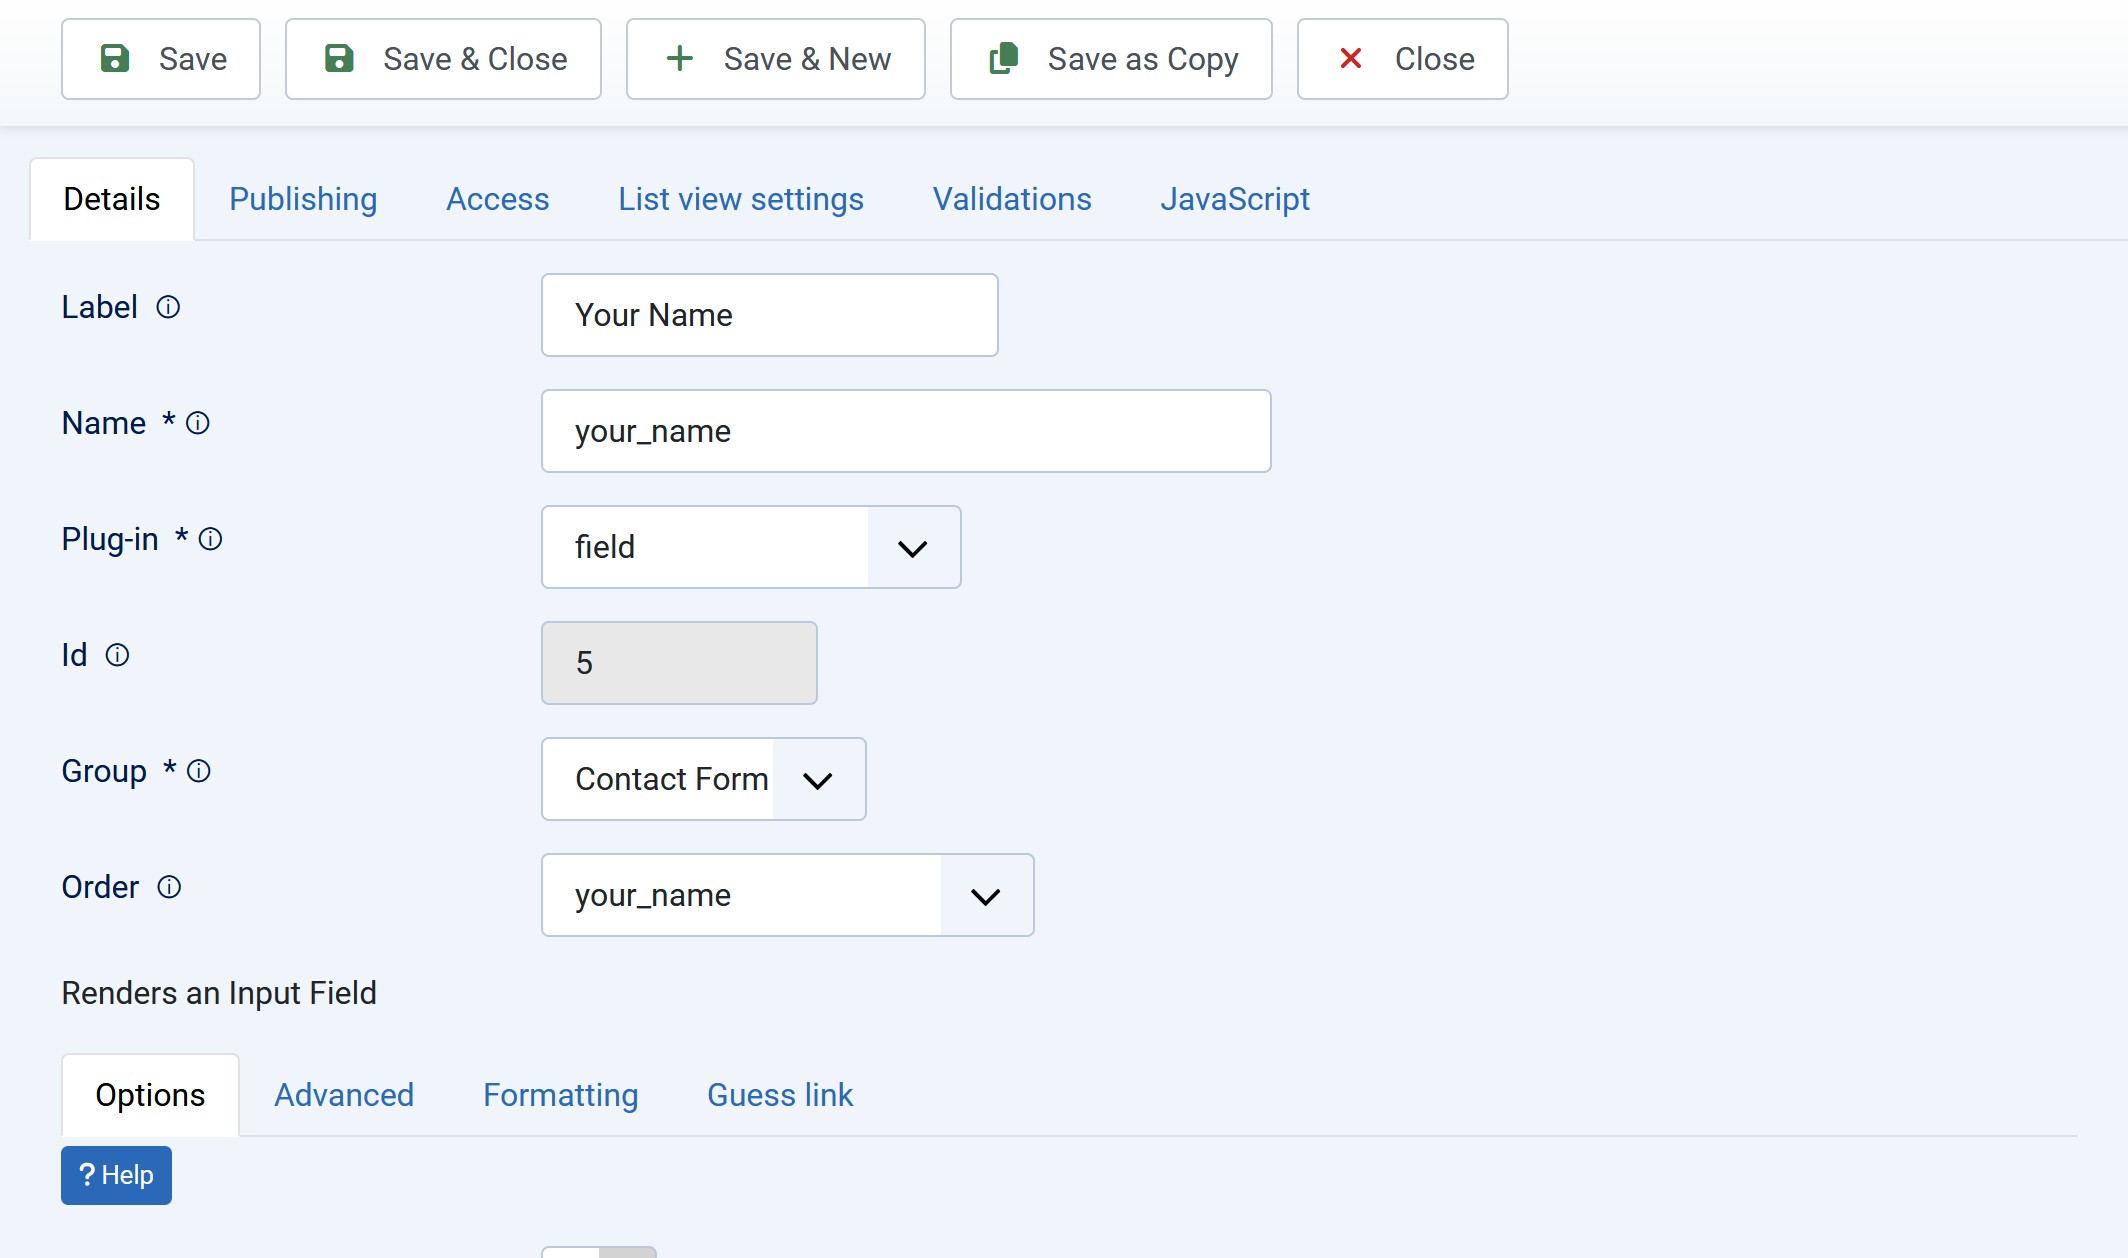
- Click New to add a new element.
- Make sure to select the group created previously in the "Group" field.
- Create the following elements, selecting the respective type and adding validations:
- Label: Your Name, Element Type: Text, Validation: "Not Empty".
- Label: Your Email, Element Type: Email:
- In the Advanced tab, ensure to select the input type as "Email".
- Validation: "Not Empty" and "Is Email".
- Label: Subject, Element Type: Text, Validation: "Not Empty".
- Label: Message, Element Type: Text Area, Validation: "Not Empty".
- Label: Captcha, Element Type: Captcha.
- Label: Privacy Acceptance, Element Type: Checkbox, Validation: "Not Empty".
Step 3: Configure Email Form Plugin
- Go to Fabrik > Forms and click on the contact form you created previously.
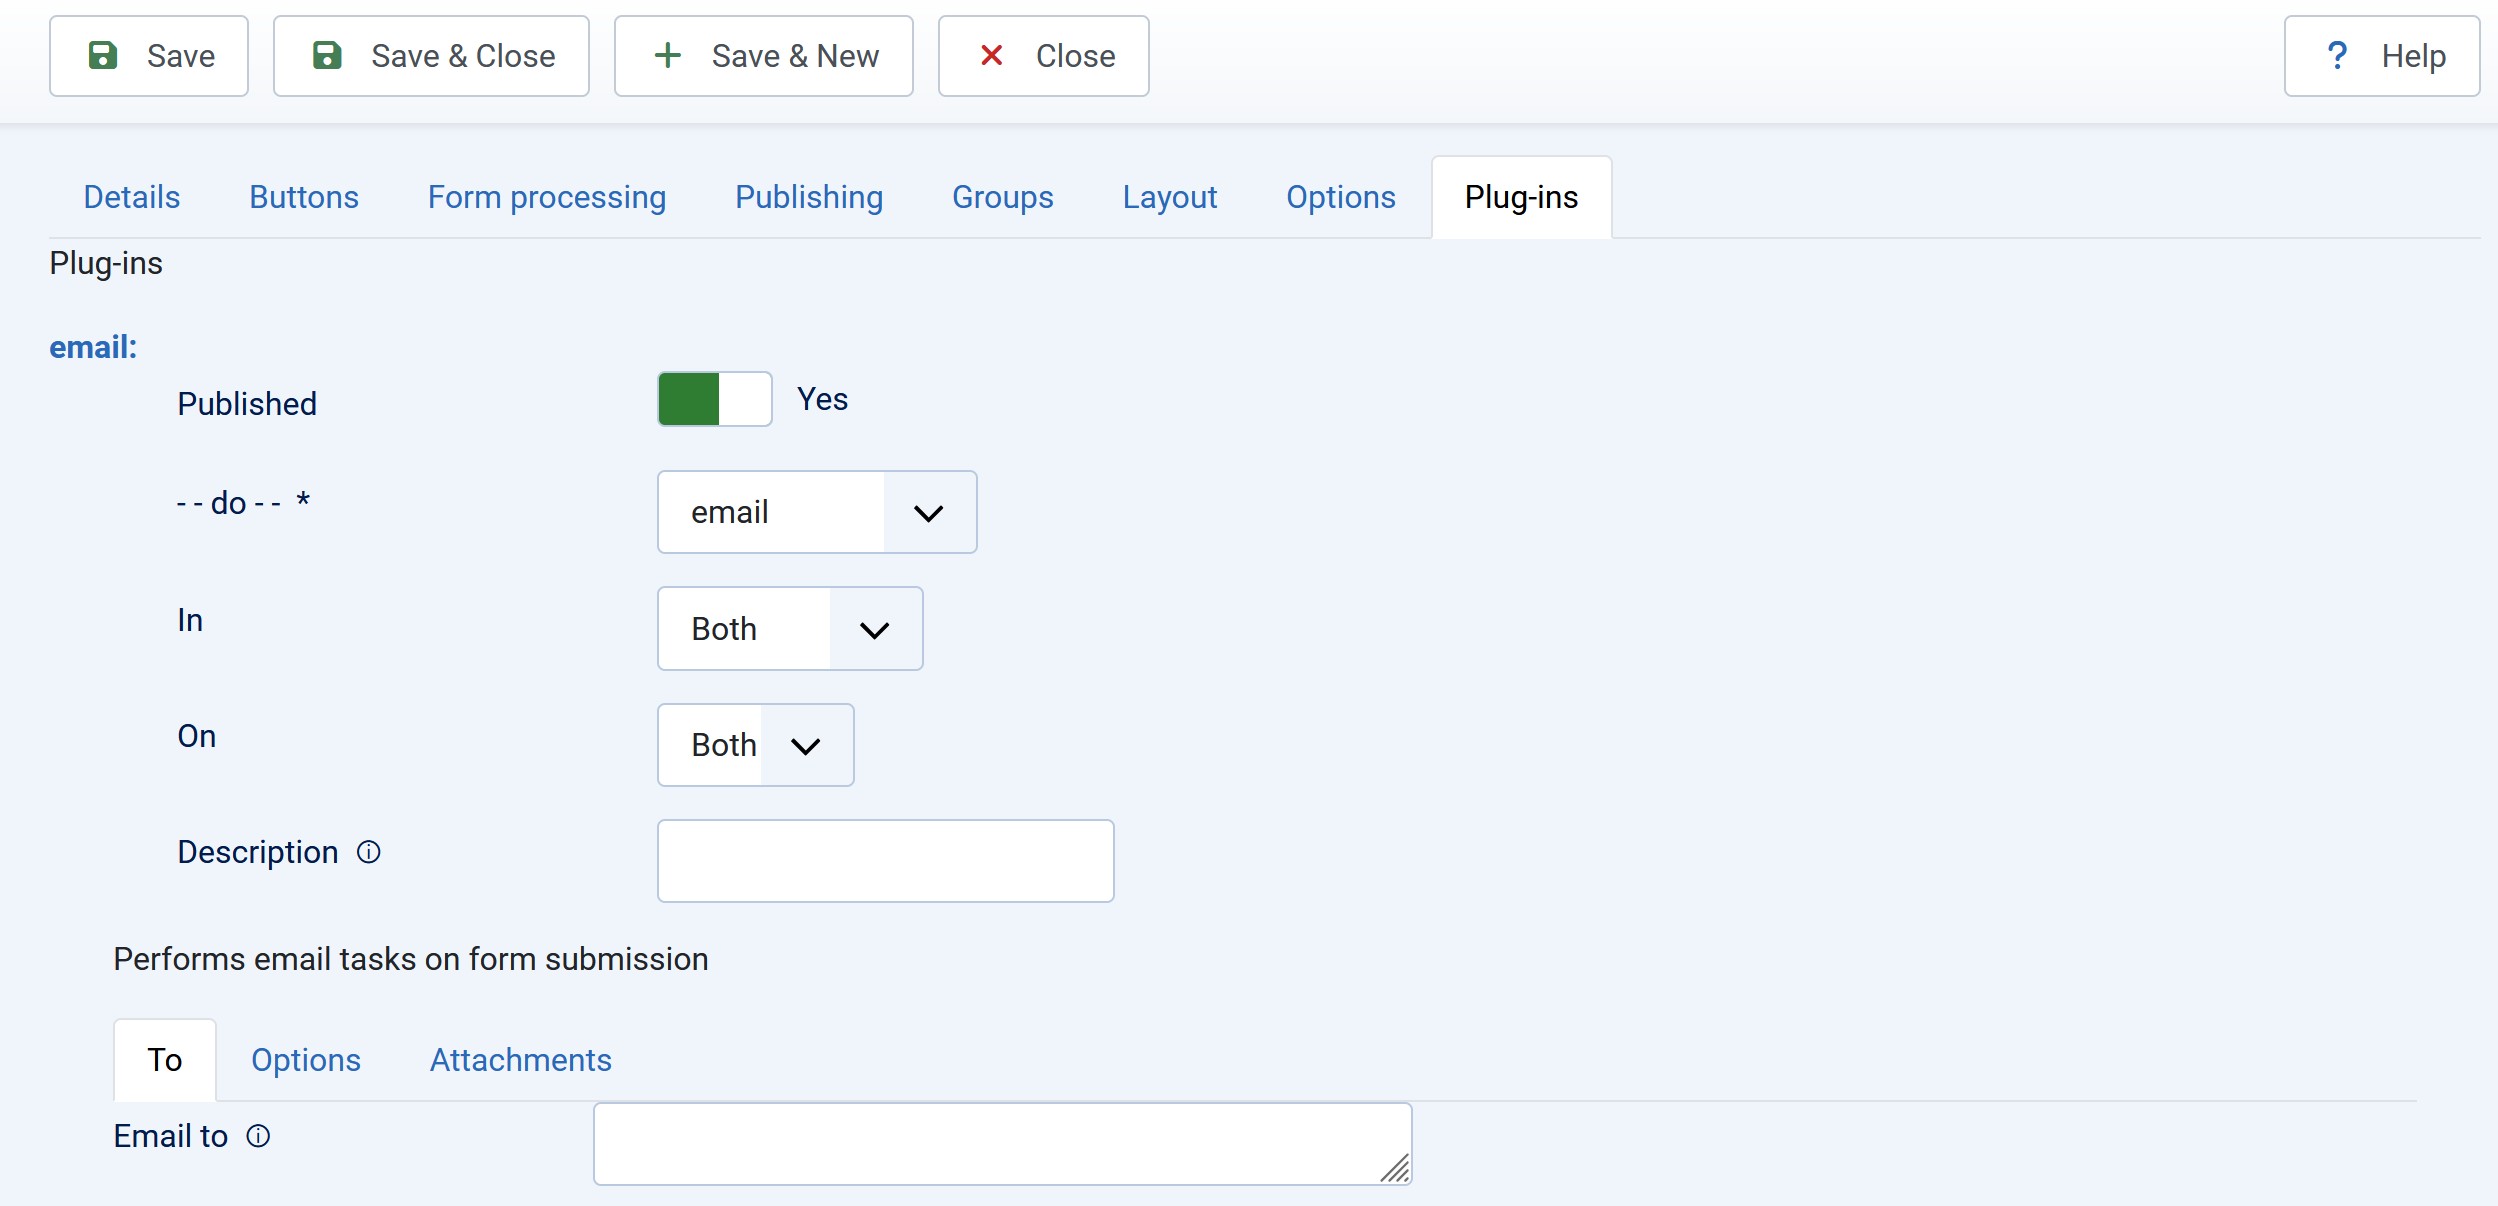
- Navigate to the Plugins box and click Add.
- From the dropdown menu, select Email to begin configuring the plugin.
- In the To tab, under Email To, enter the email address where you want the emails to arrive (e.g.,
This email address is being protected from spambots. You need JavaScript enabled to view it. ). - In the From tab, enter the name from which the email will be sent, including the name that will appear in the email. For example:
This email address is being protected from spambots. You need JavaScript enabled to view it. :MyNameSite - In the Reply To tab, enter the placeholder of the previously created element, in our case
{contact_form___your_mail}. - In the Subject tab, enter
{contact_form___subject}.
Step 4: Customize Visible Elements in the List
- In this step, we will customize which elements will be visible in the list of messages sent by users.
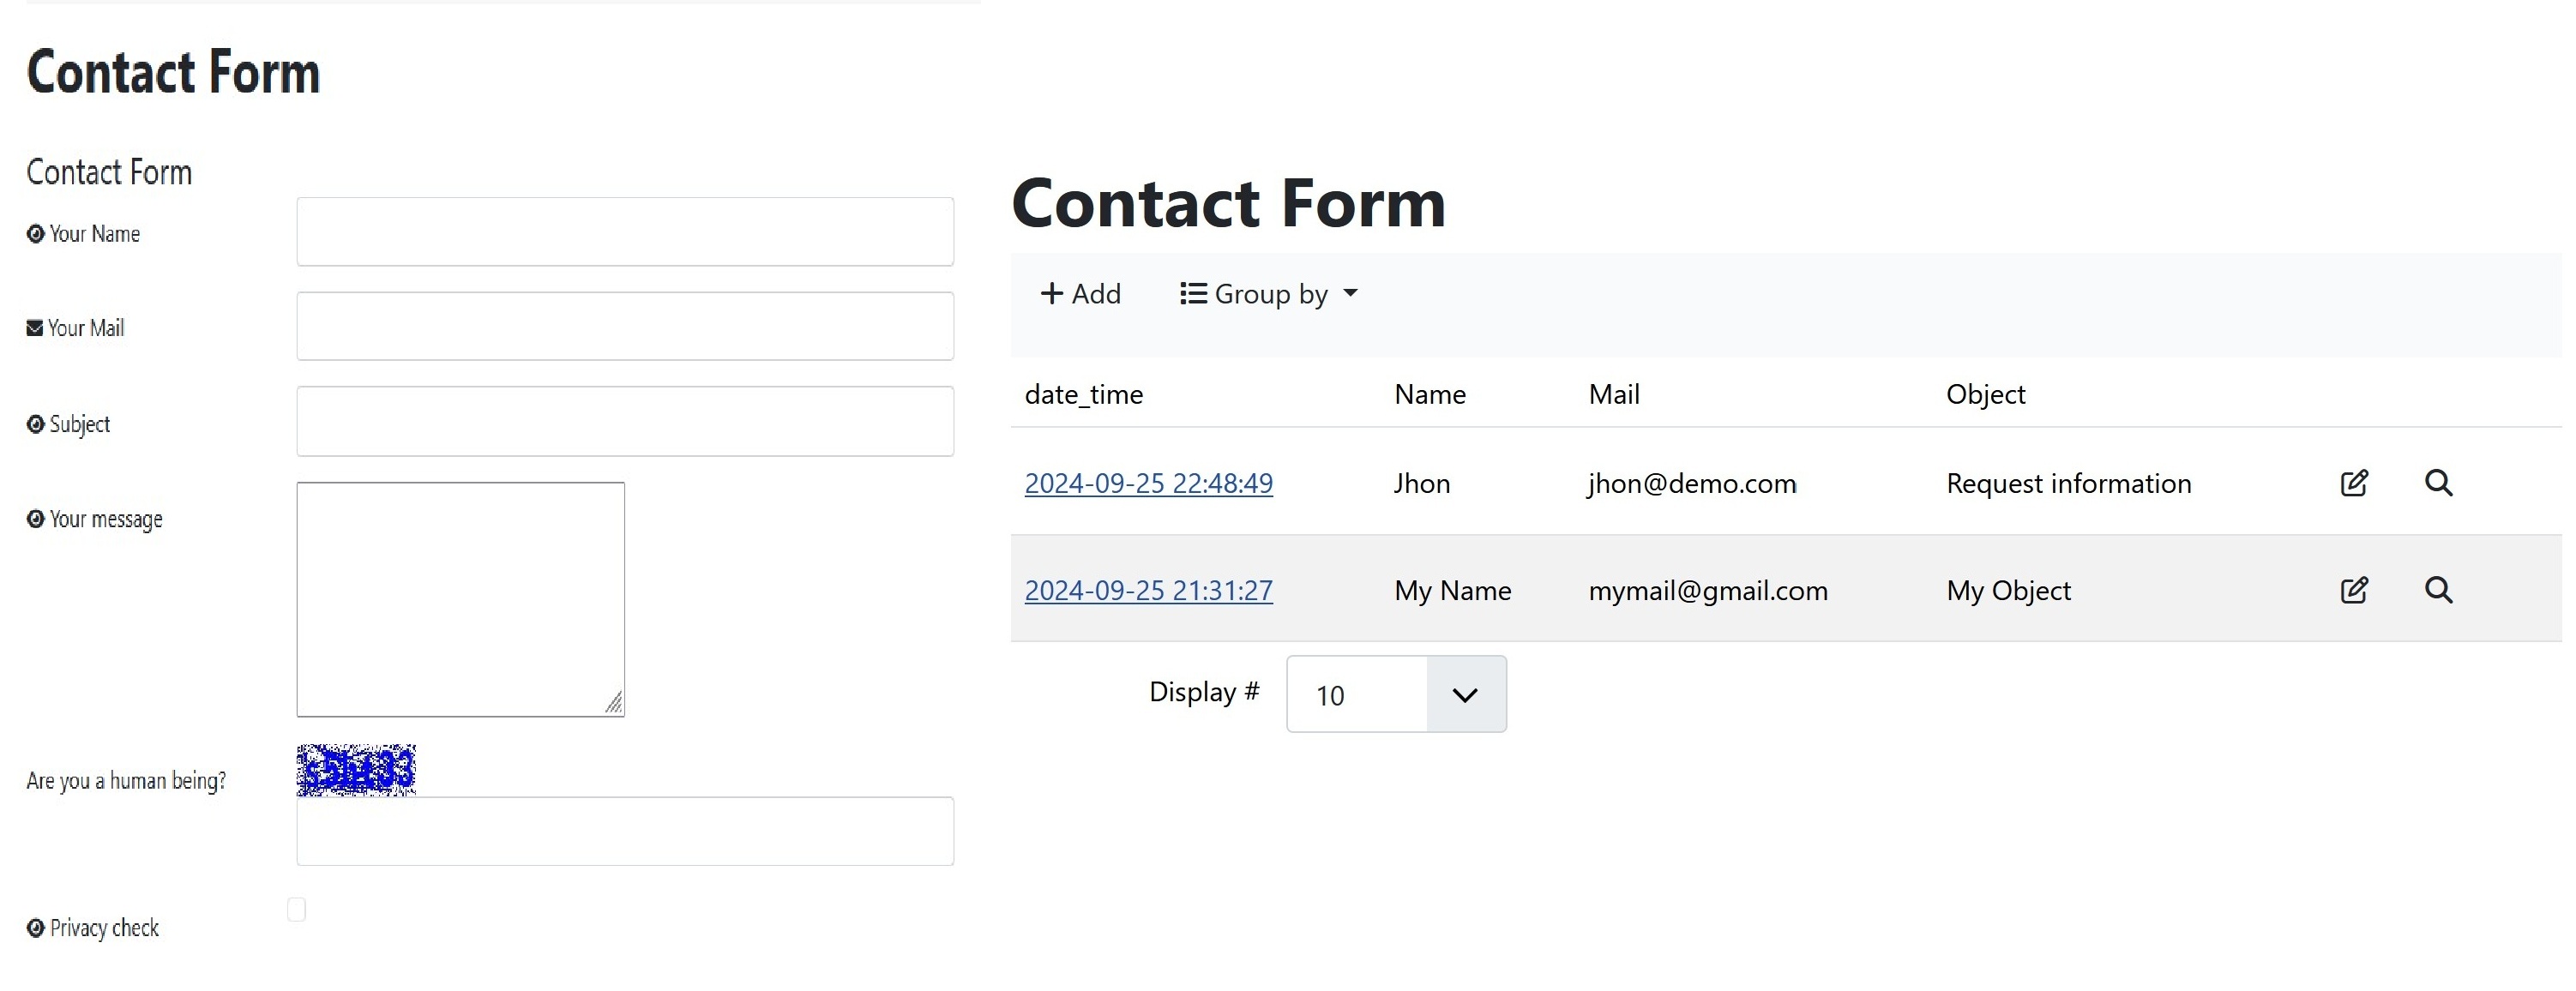
- In our case, we will hide the ID element, which we do not need, and show the elements Your Name, Your Email, and Subject. If desired, we can also show the Message directly in the list.
- After creating the menu links, we will be able to see directly for each row the elements we have enabled to show in the list.
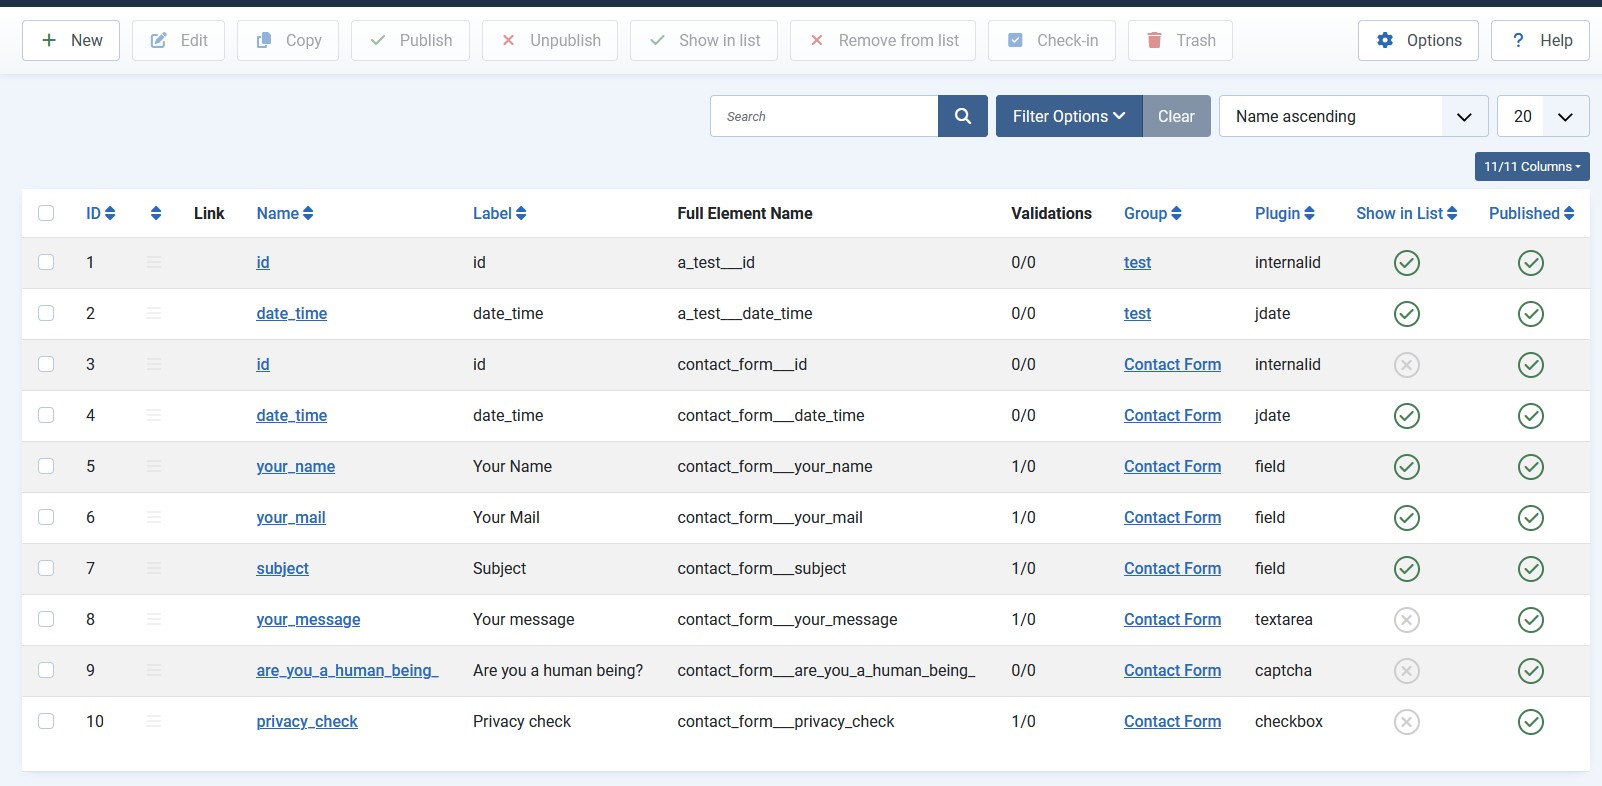
- To enable the elements, go to Fabrik > Elements:
- Select the ID element and click on the Show in List column (already set by default). Click on it to hide it from our list.
- Select the elements we want to make visible in the list: Your Name, Your Email, and Subject (the Datetime element is already shown by default).
- At the top, click the Show in List button; this way, all three elements will be automatically selected as "show in list," instead of doing it individually for each.
Customizing List Headers
- At the end of this configuration, the table will have headers with the following elements: Your Name, Your Email, and Subject.
- To better adapt them for us, we will change the label seen by us administrators for Your Name and Your Email.
- Go to Fabrik > Elements and select Your Name. In the List View Settings tab, in the Heading Label field, enter "Name". Do the same for Your Email, entering only "Mail".
Step 5: Set Up Menu Joomla
- In this step, we will create two menu items:
- Step 27: Create the Link to the Contact Form
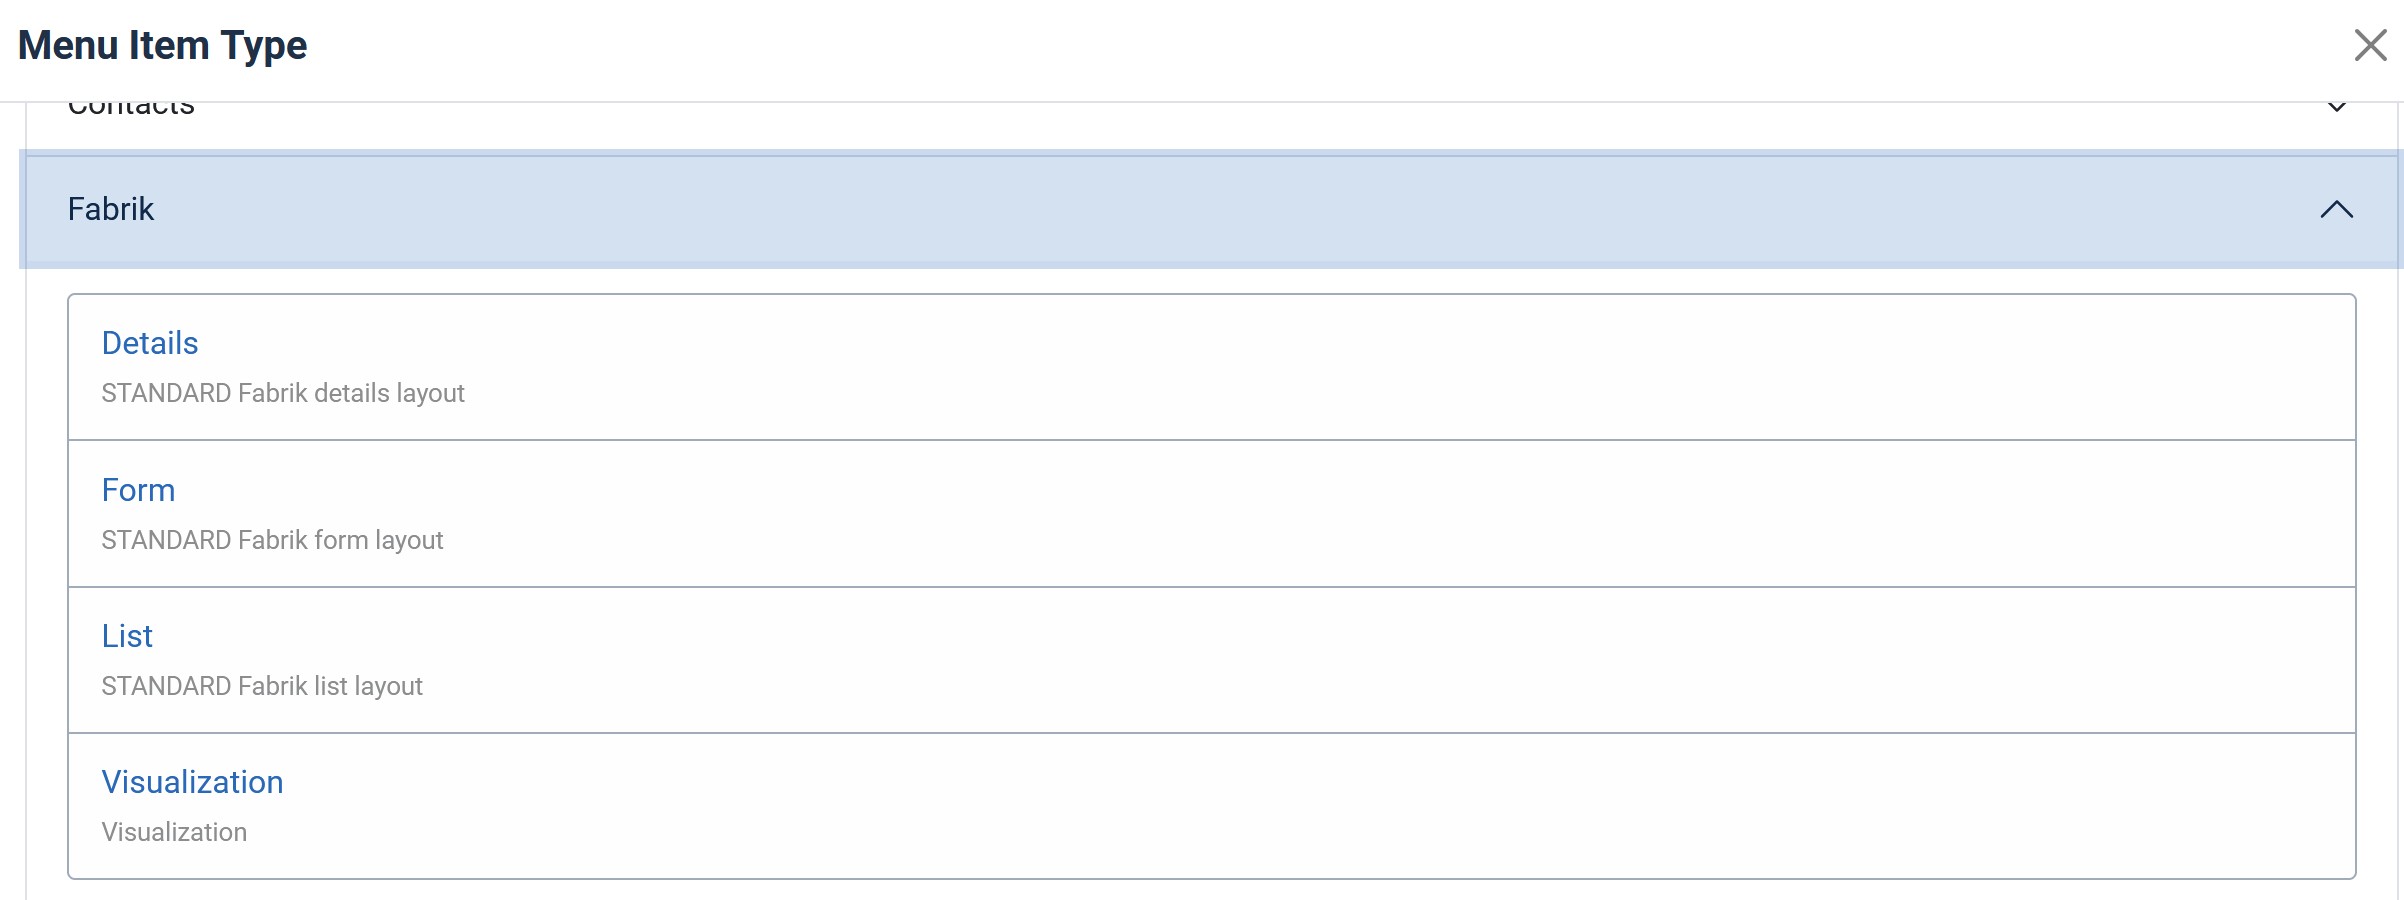
- Go to Menu > New to create a new menu item.
- In Menu Item Type, select Fabrik and in the proposed options select Form.
- After selecting Form, in the Fabrik Form field, choose your form from the dropdown and select Contact Us.
- In this case, the link will be a direct access to the contact form, and once submitted, the user will be automatically redirected to the previous page they came from.
- Step 28: Create the Link to the List of Received Messages
- Repeat the process of creating a new menu link.
- Go to Menu > New.
- In Menu Item Type, select Fabrik again, but this time choose List.
- In the Fabrik List field, select the list corresponding to the received messages and set the access level to Registered.
Conclusion
In this guide, we have created a contact form and a list containing the data sent by users. This example represents a starting point to explore the capabilities of Fabrik. The steps we have executed demonstrate a broad example of what can be achieved with this powerful tool. You can modify your form to fit any use case you can think of, making Fabrik extremely versatile. Remember that this guide provides only the basics; the possibilities for customization and expansion are virtually limitless.
Useful Resources
- Online Guide: Visit the official Fabrik website for complete documentation and detailed guides.
- Support Forum: Join the Fabrik support forum to get help from the community and share your experiences.
- Video Section: Discover video tutorials on Fabrik to see the features and configurations in action.
Thank you for following this guide! If you have questions or suggestions, feel free to leave a comment below!